
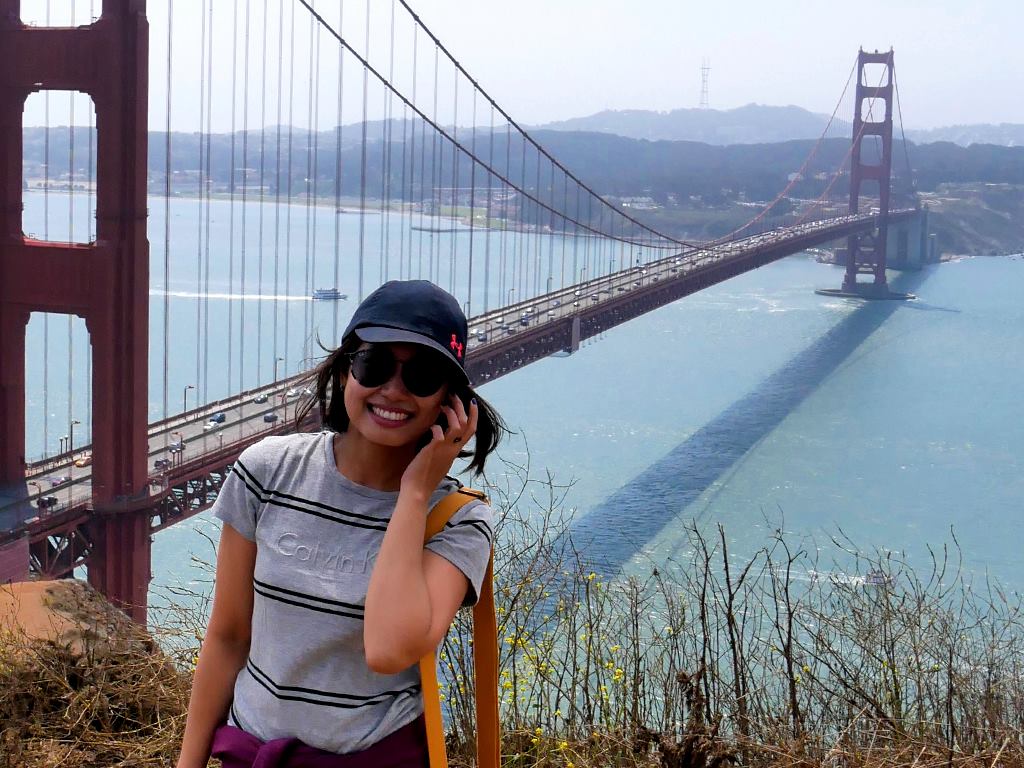
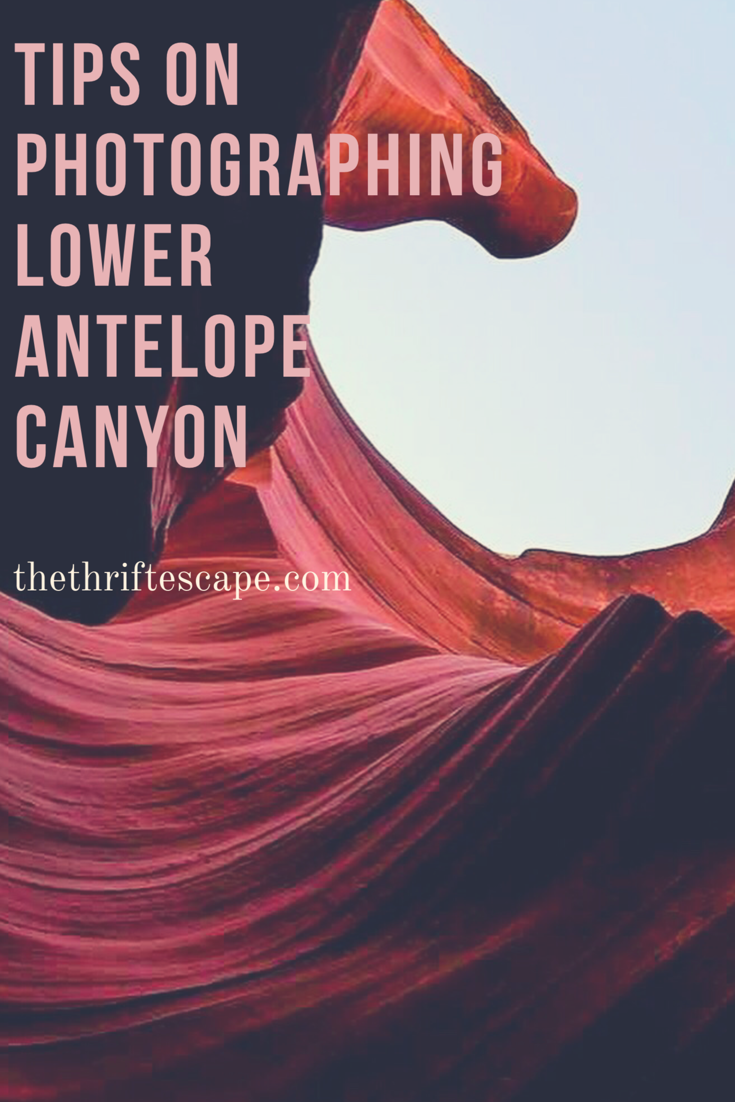
Tips in photographing inside Lower Antelope Canyon
Tips in photographing inside Lower Antelope Canyon. It was my dilemma, since I don’t want to screw up my photos in Lower Antelope Canyon. Yes, it’s an awesome experience but how will the others know how great it is, if you have blurry pictures ?.
I did some research and still confuse on what settings I should go for. I can always choose Manual, but, I haven’t tried this mode, ever. Or I can always go for Aperture mode. Well, to be sure I need to learn how to set up manual mode, I mean, what will be the best settings to capture this moment, right?
I did try some couple shots, 2 weeks before the tour. And hopefully it will work. Well the guide, confuse me too, since they advise to use the Program mode ?. Well, there’s one thing to see, try to shoot as many as you like ?.
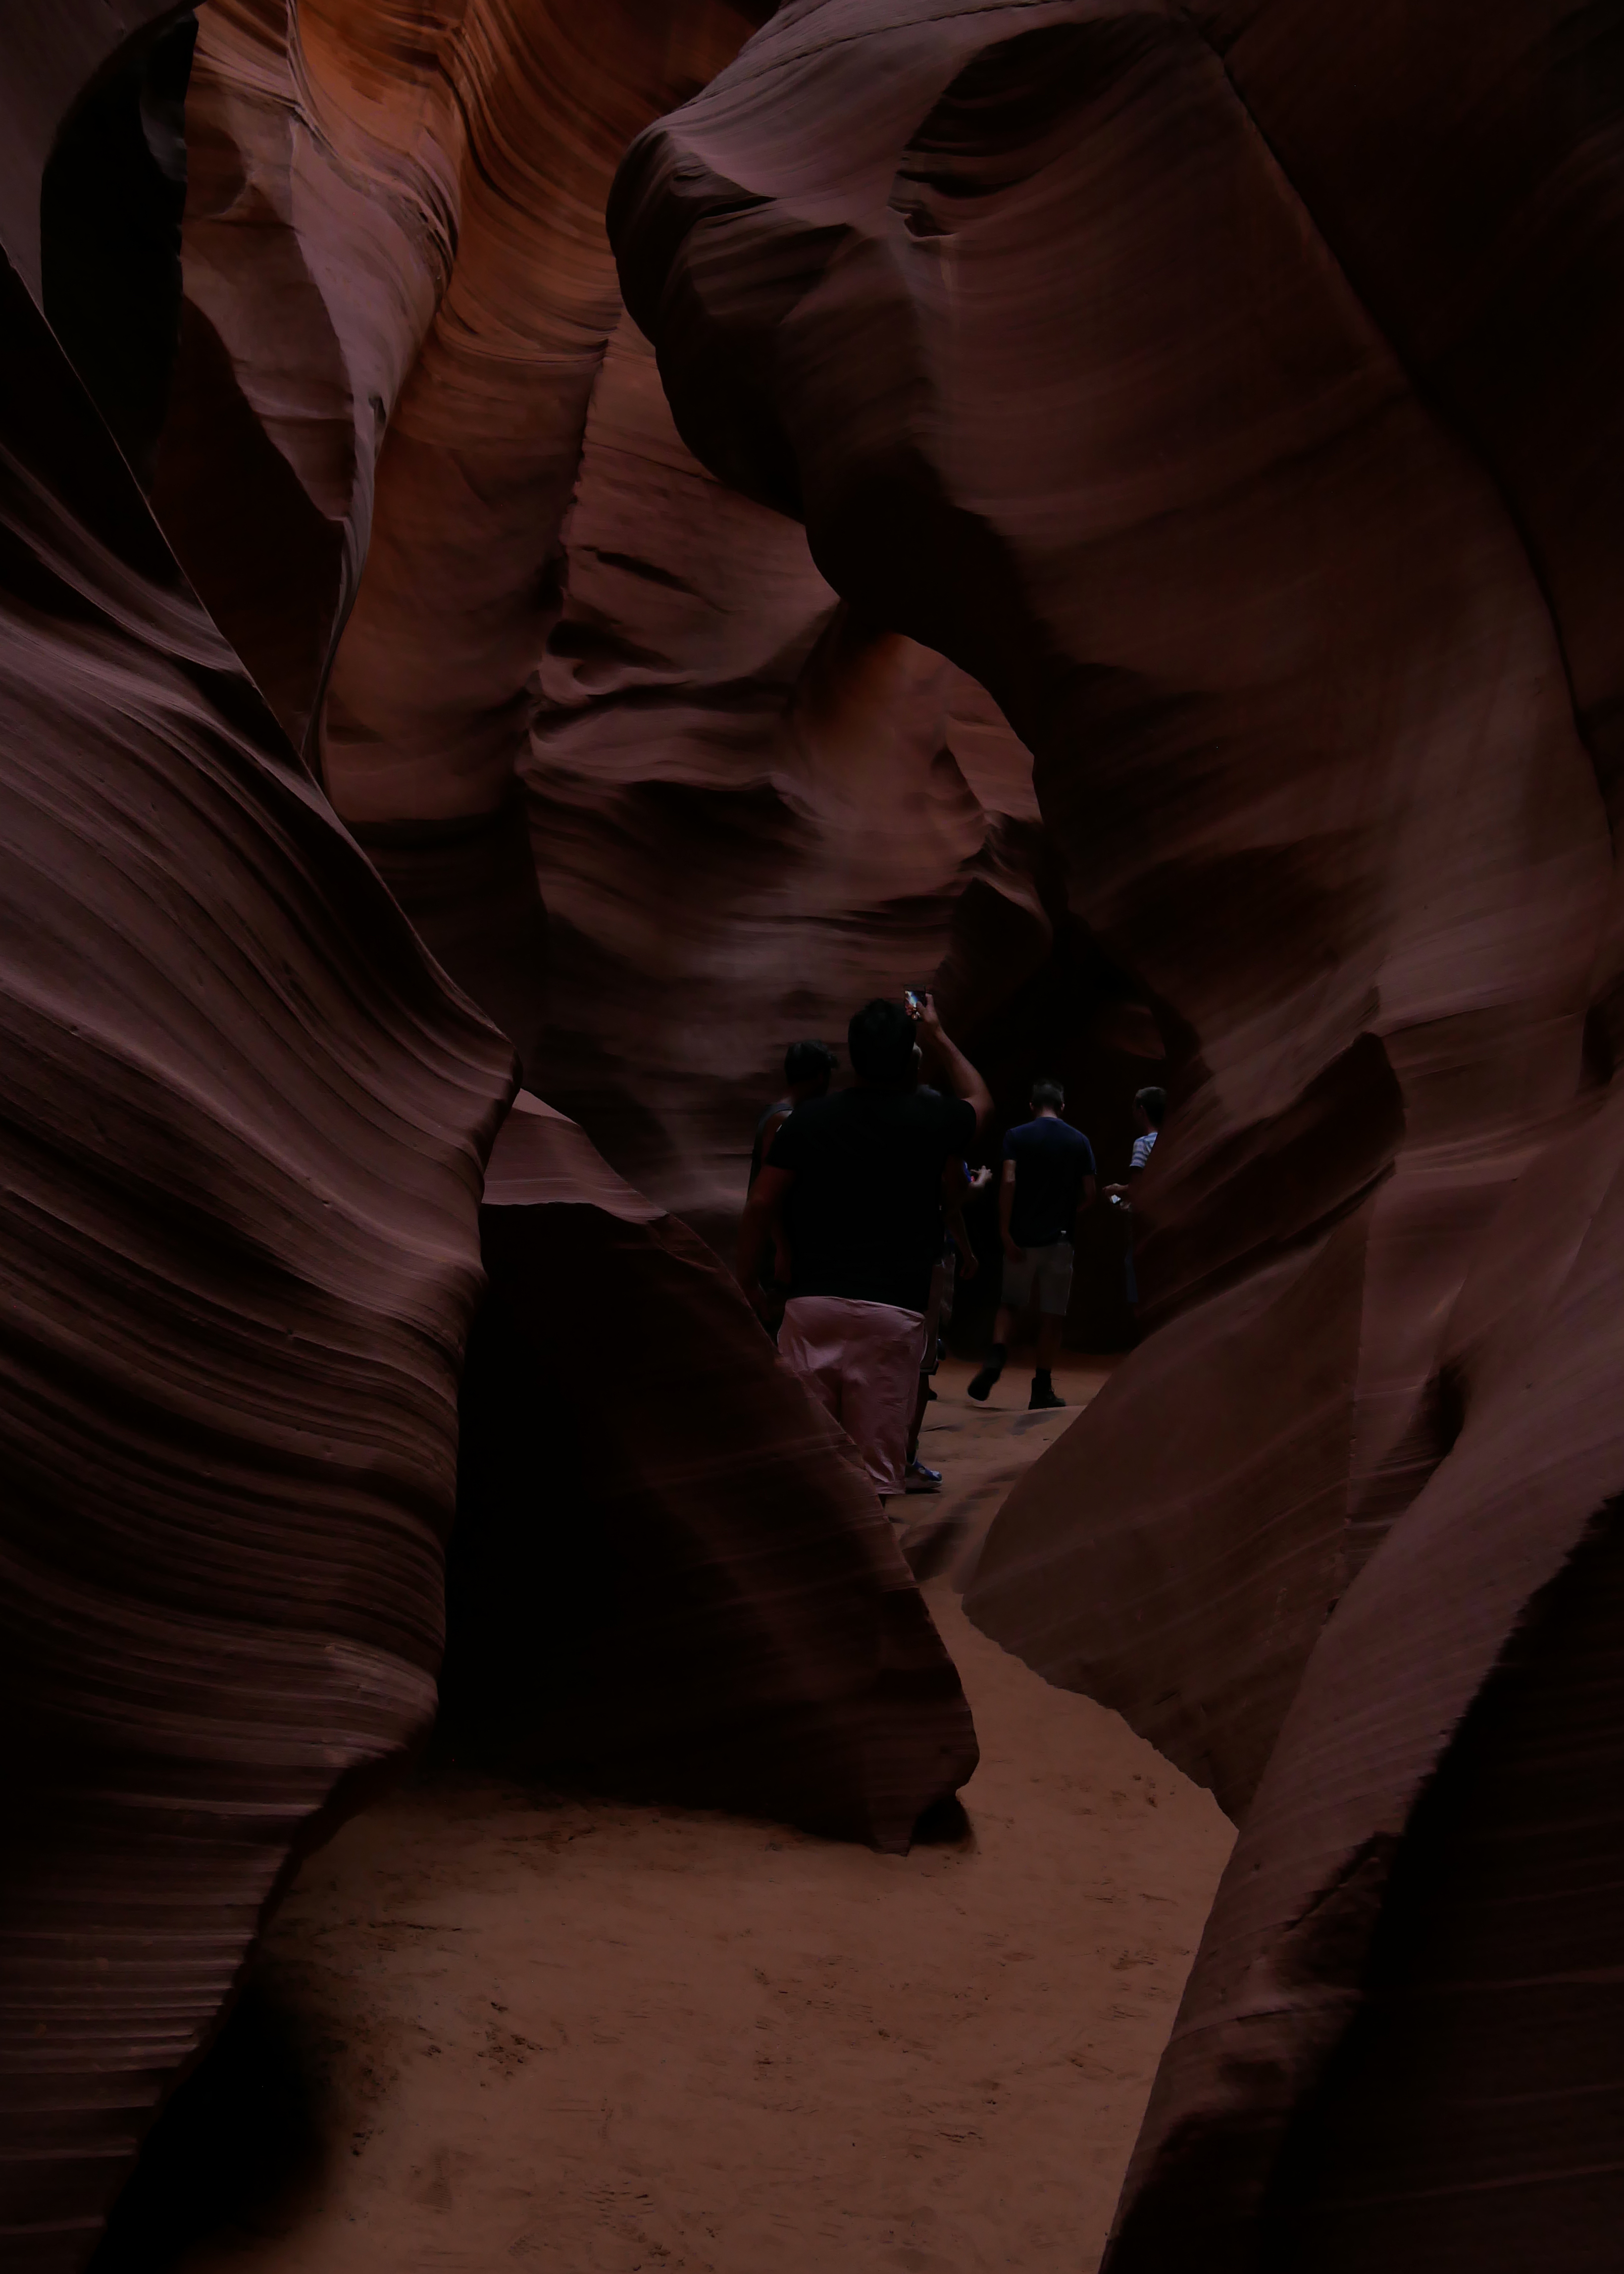
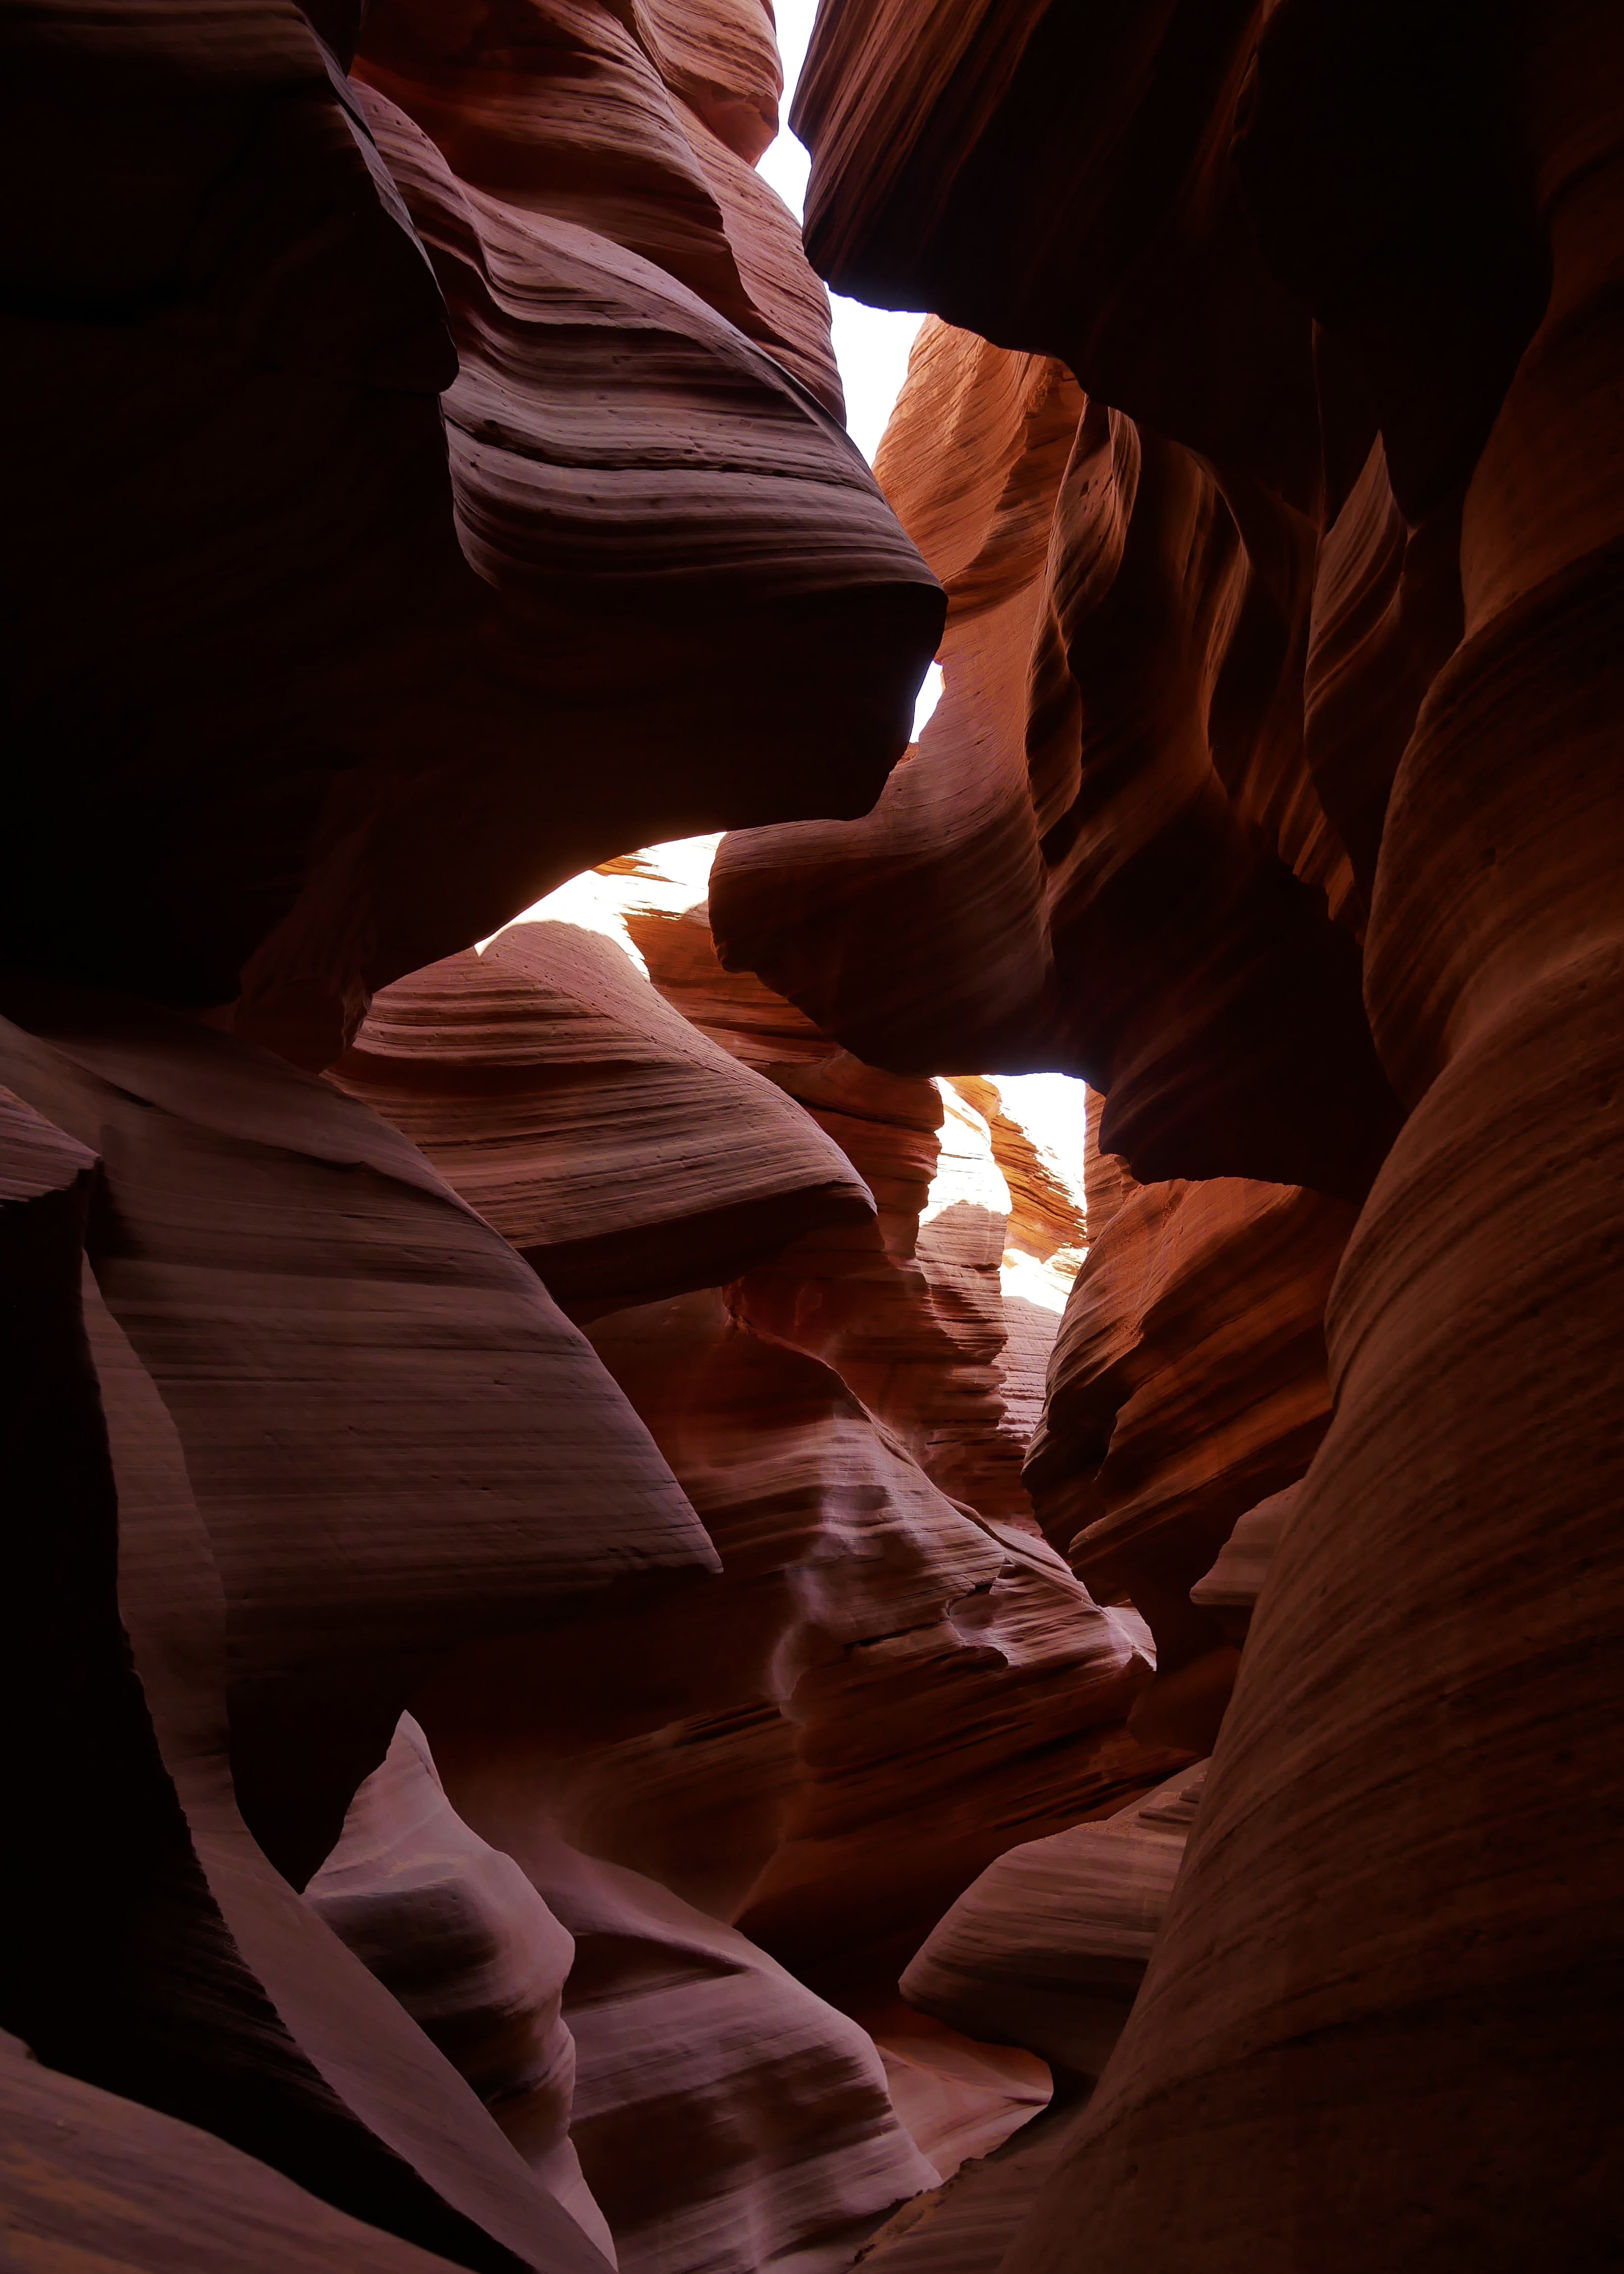
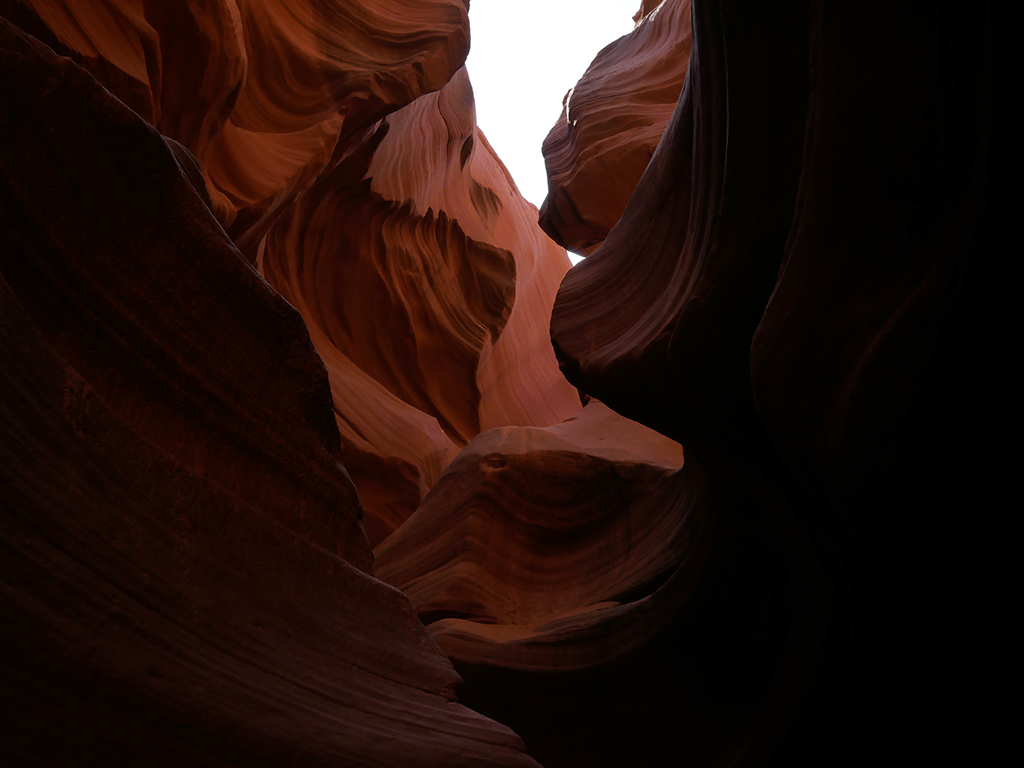
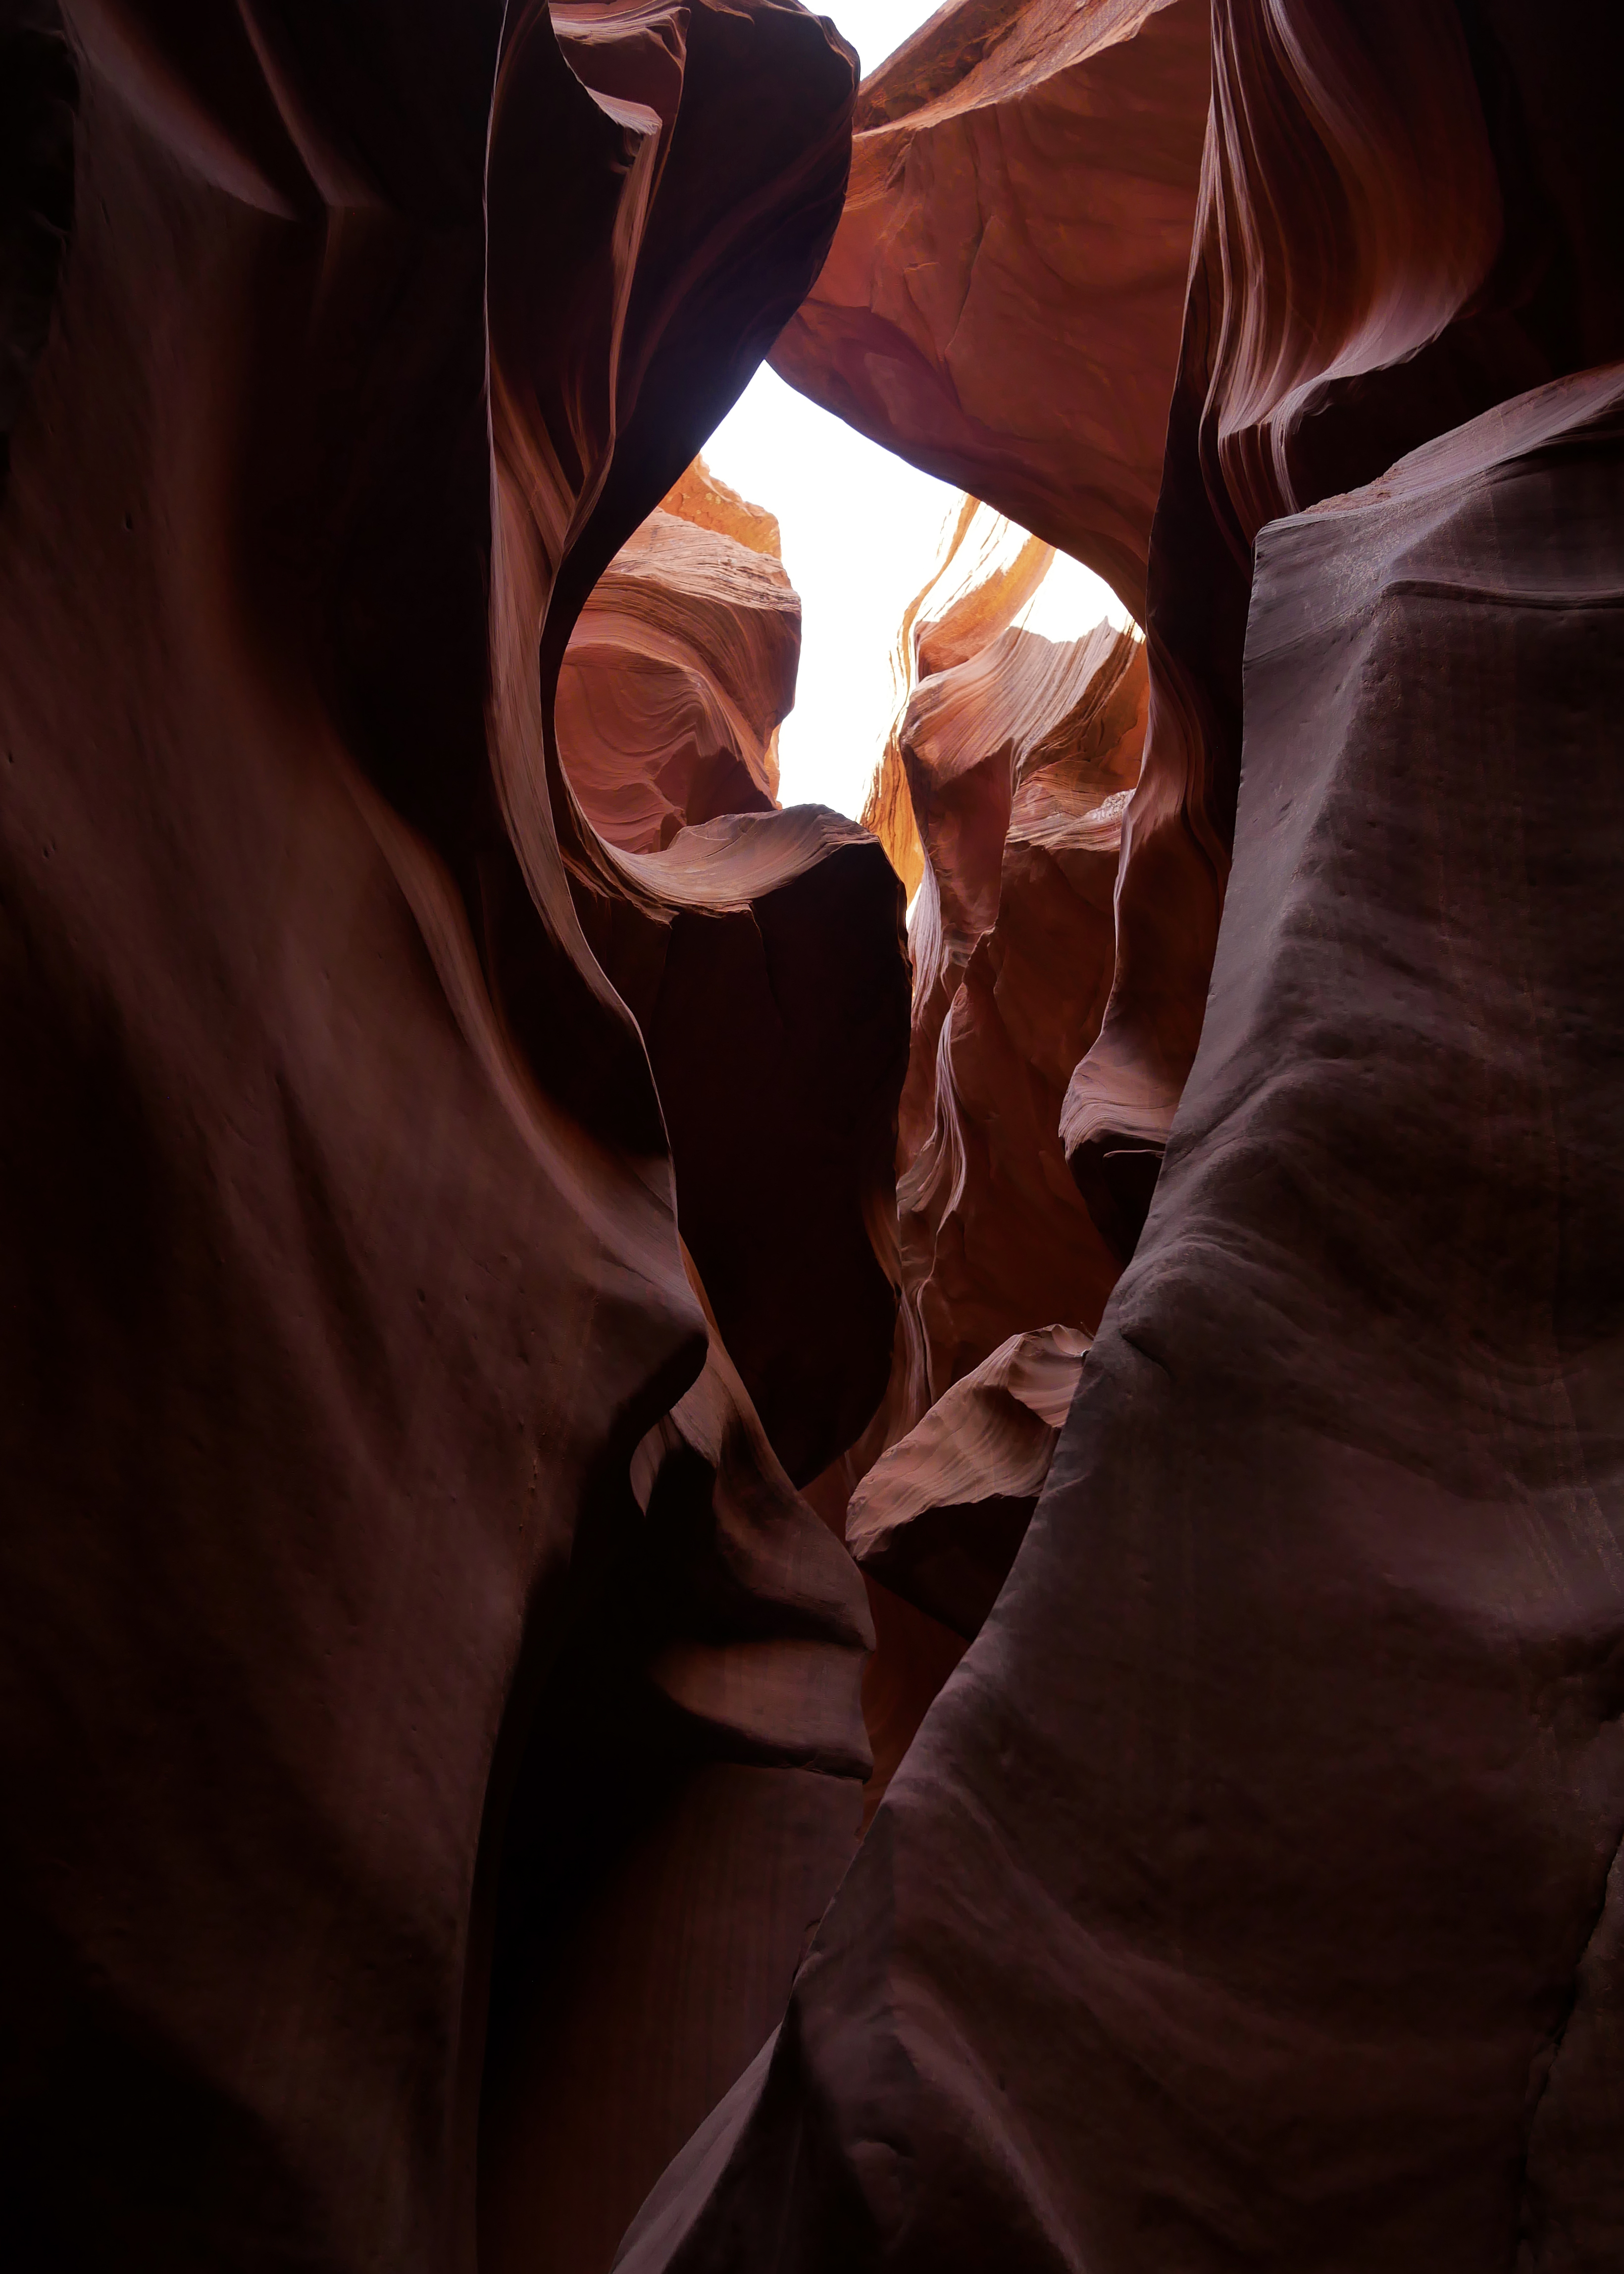
Here are some shots taken from my camera, with their EXIF. And, I was really happy of the output. I did 3 modes, the Manual, Program and aperture. Since there are some spots that are really dark, and there are some that have some lights.
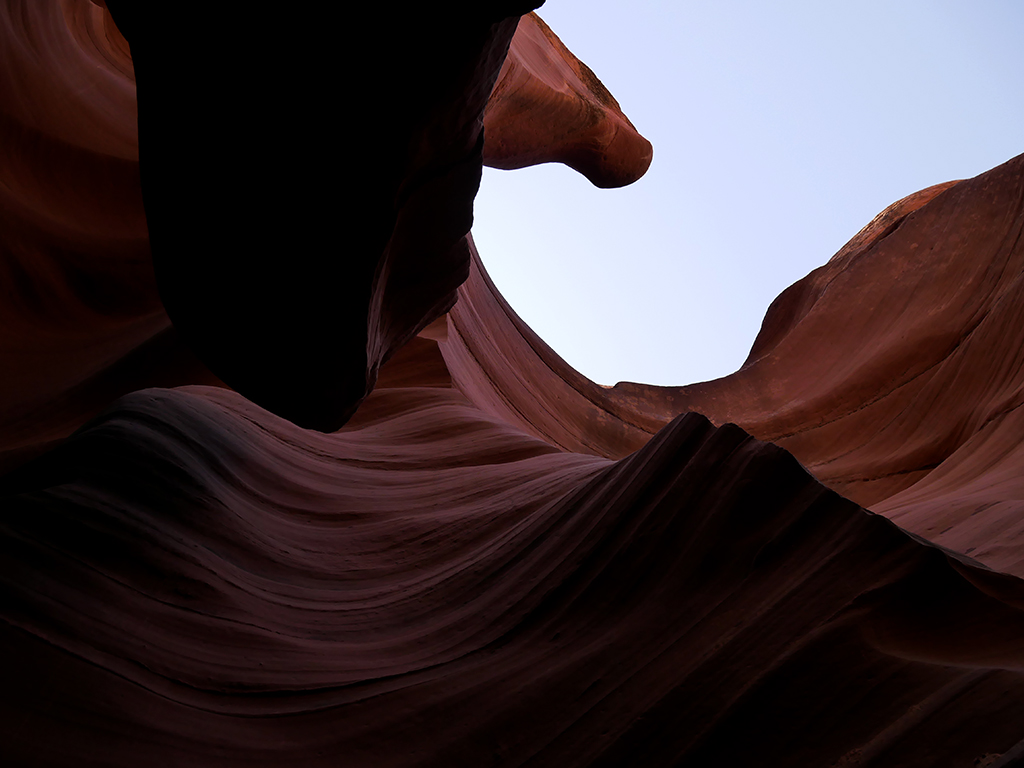
F-Stop: f/3.5
Exposure: 1/400 sec.
ISO speed: ISO-200
Focal length: 20mm
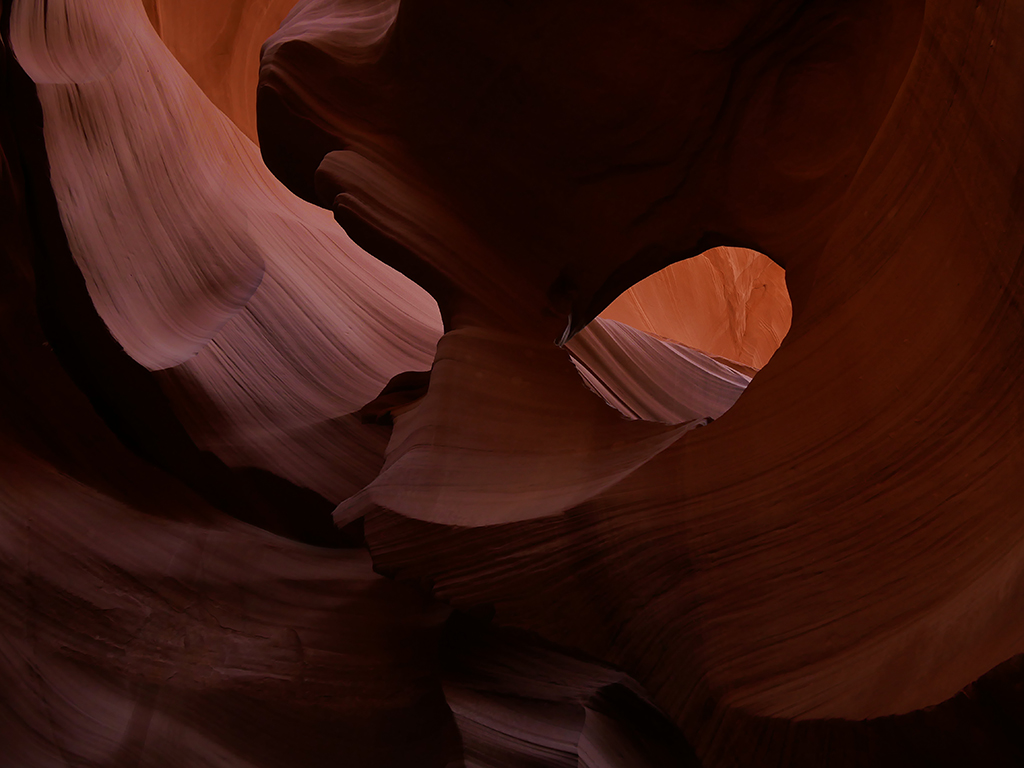
F-Stop: f/4
Exposure: 1/100 sec.
ISO speed: ISO-200
Focal length: 20mm
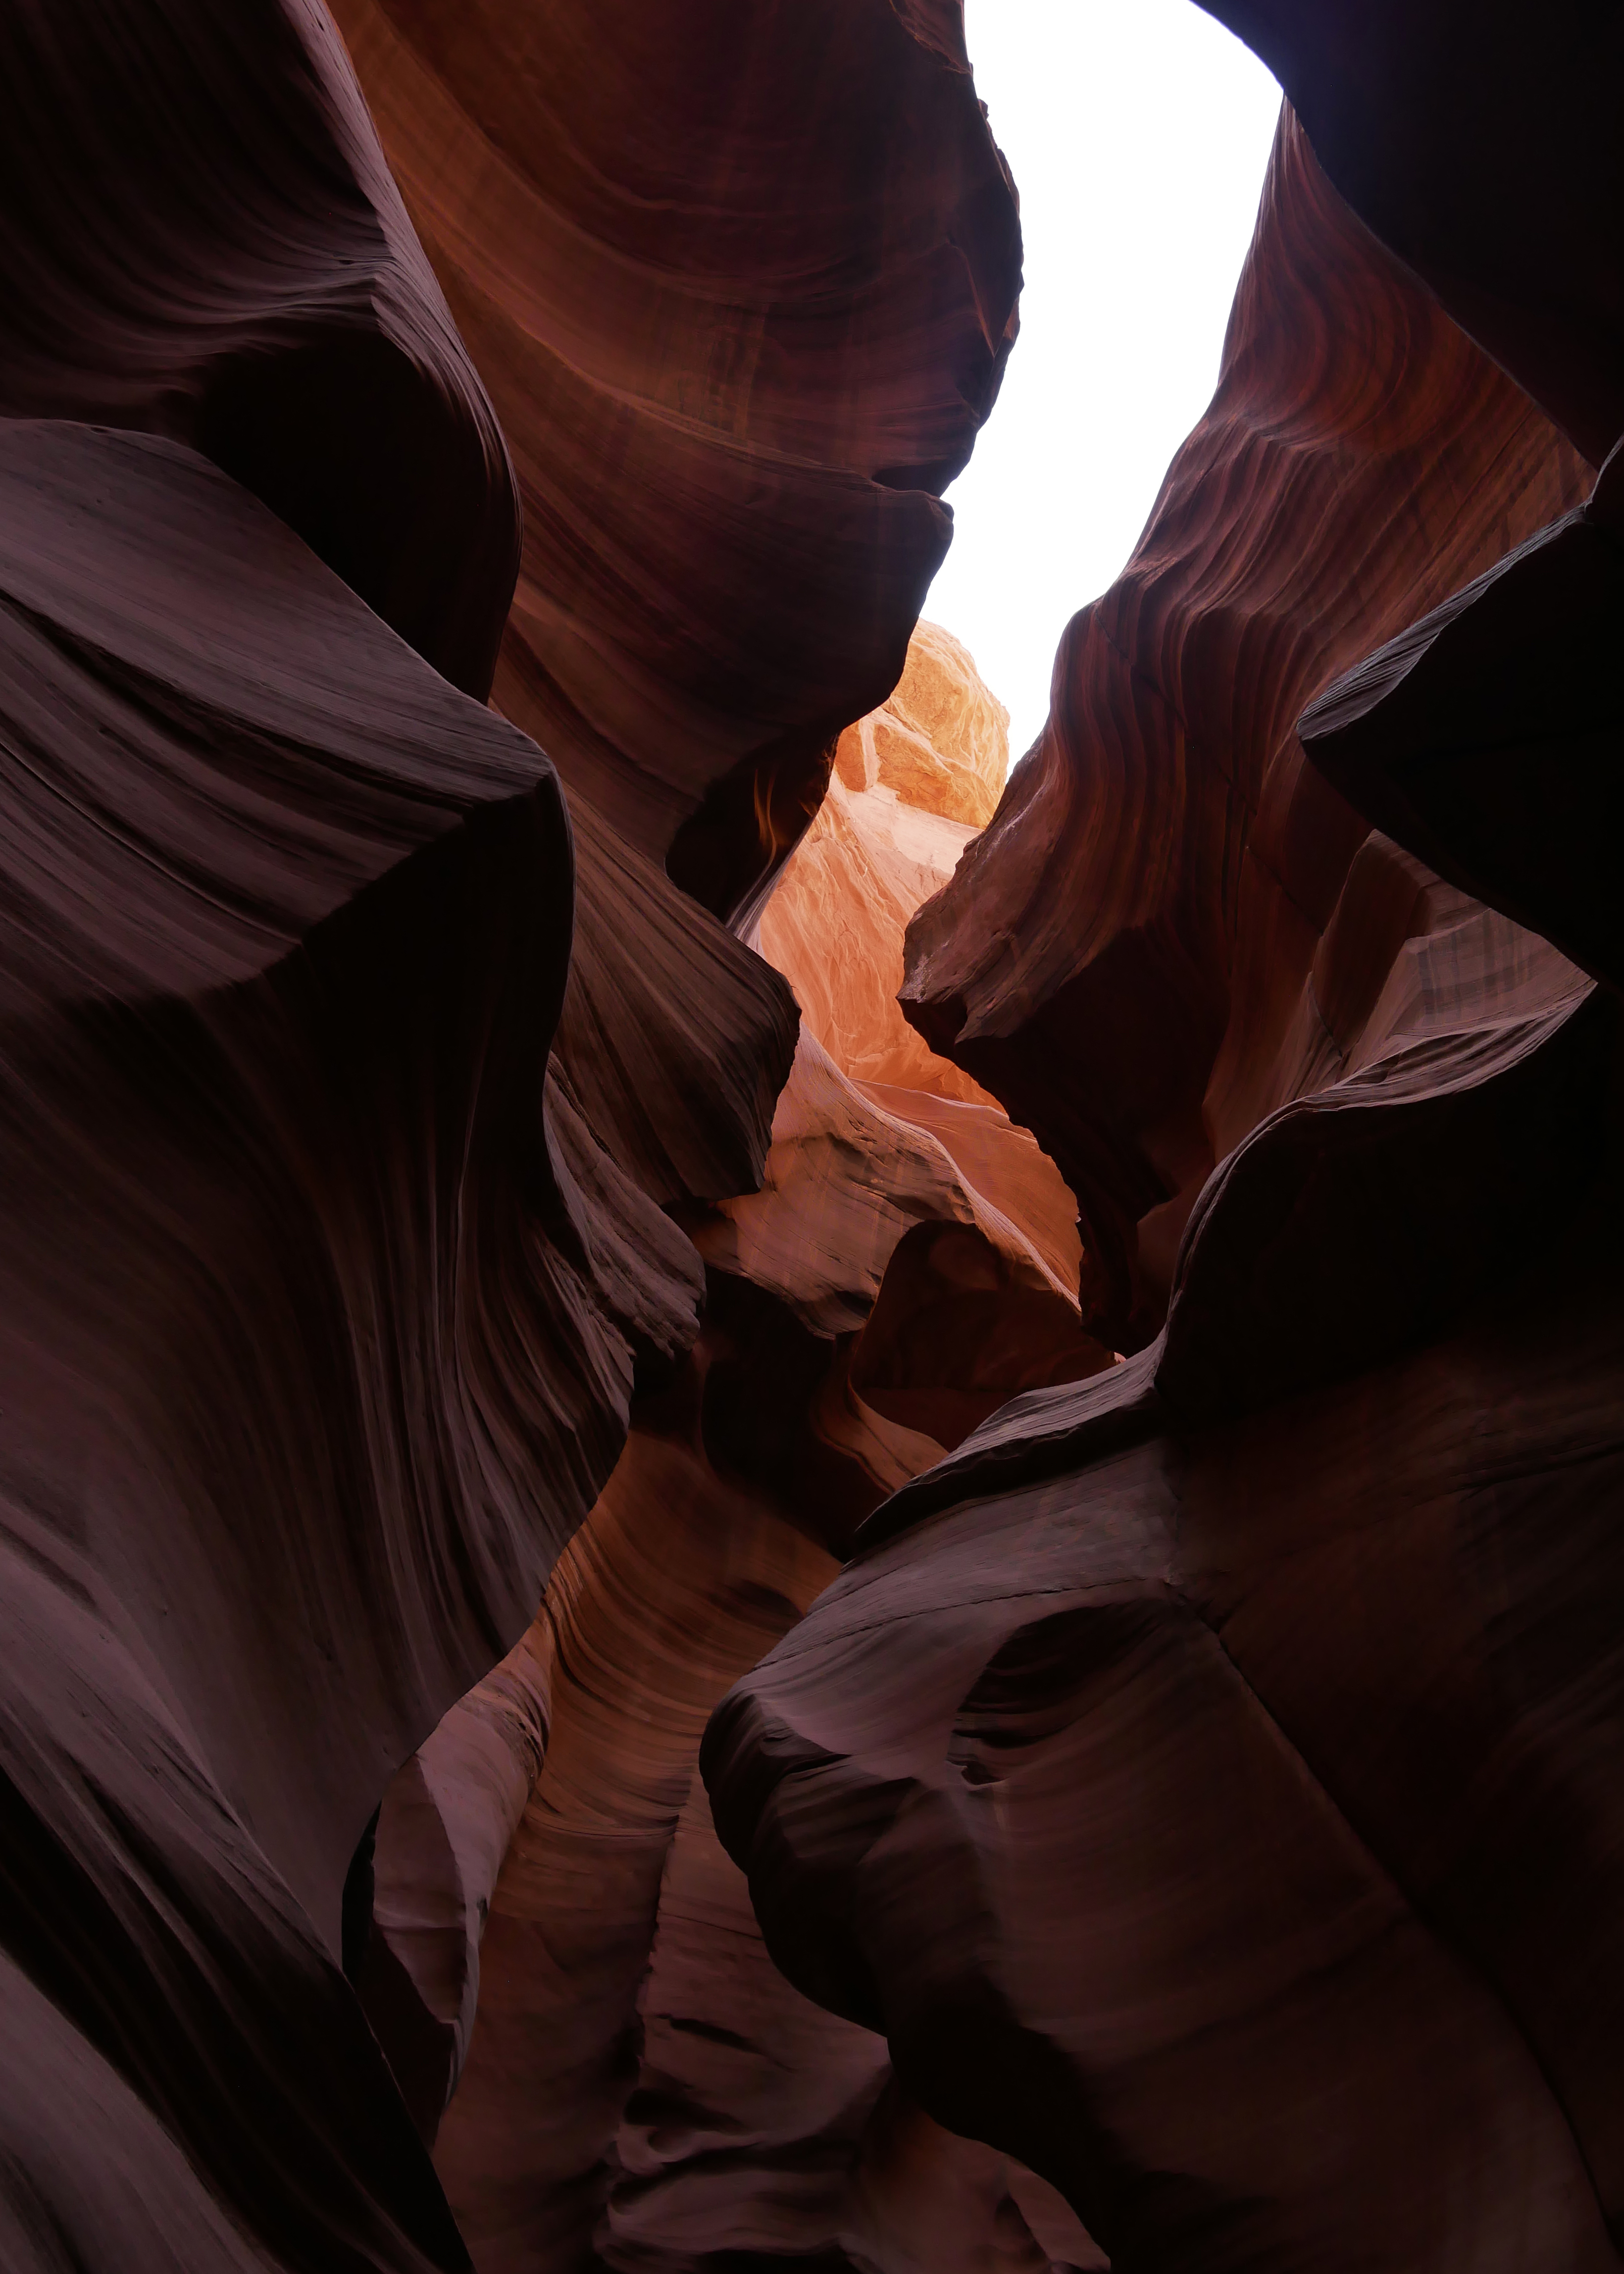
F-Stop: f/4
Exposure: 1/100 sec.
ISO speed: ISO-200
Focal length: 20mm
F-Stop: f/4
Exposure: 1/100 sec.
ISO speed: ISO-200
Focal length: 20mm
F-Stop: f/2.8
Exposure: 1/125 sec.
ISO speed: ISO-200
Focal length: 20mm
F-Stop: f/8
Exposure: 1/125 sec.
ISO speed: ISO-200
Focal length: 20mm
F-Stop: f/2.8
Exposure: 1/125 sec.
ISO speed: ISO-200
Focal length: 20mm
F-Stop: f/2.8
Exposure: 1/125 sec.
ISO speed: ISO-200
Focal length: 20mm
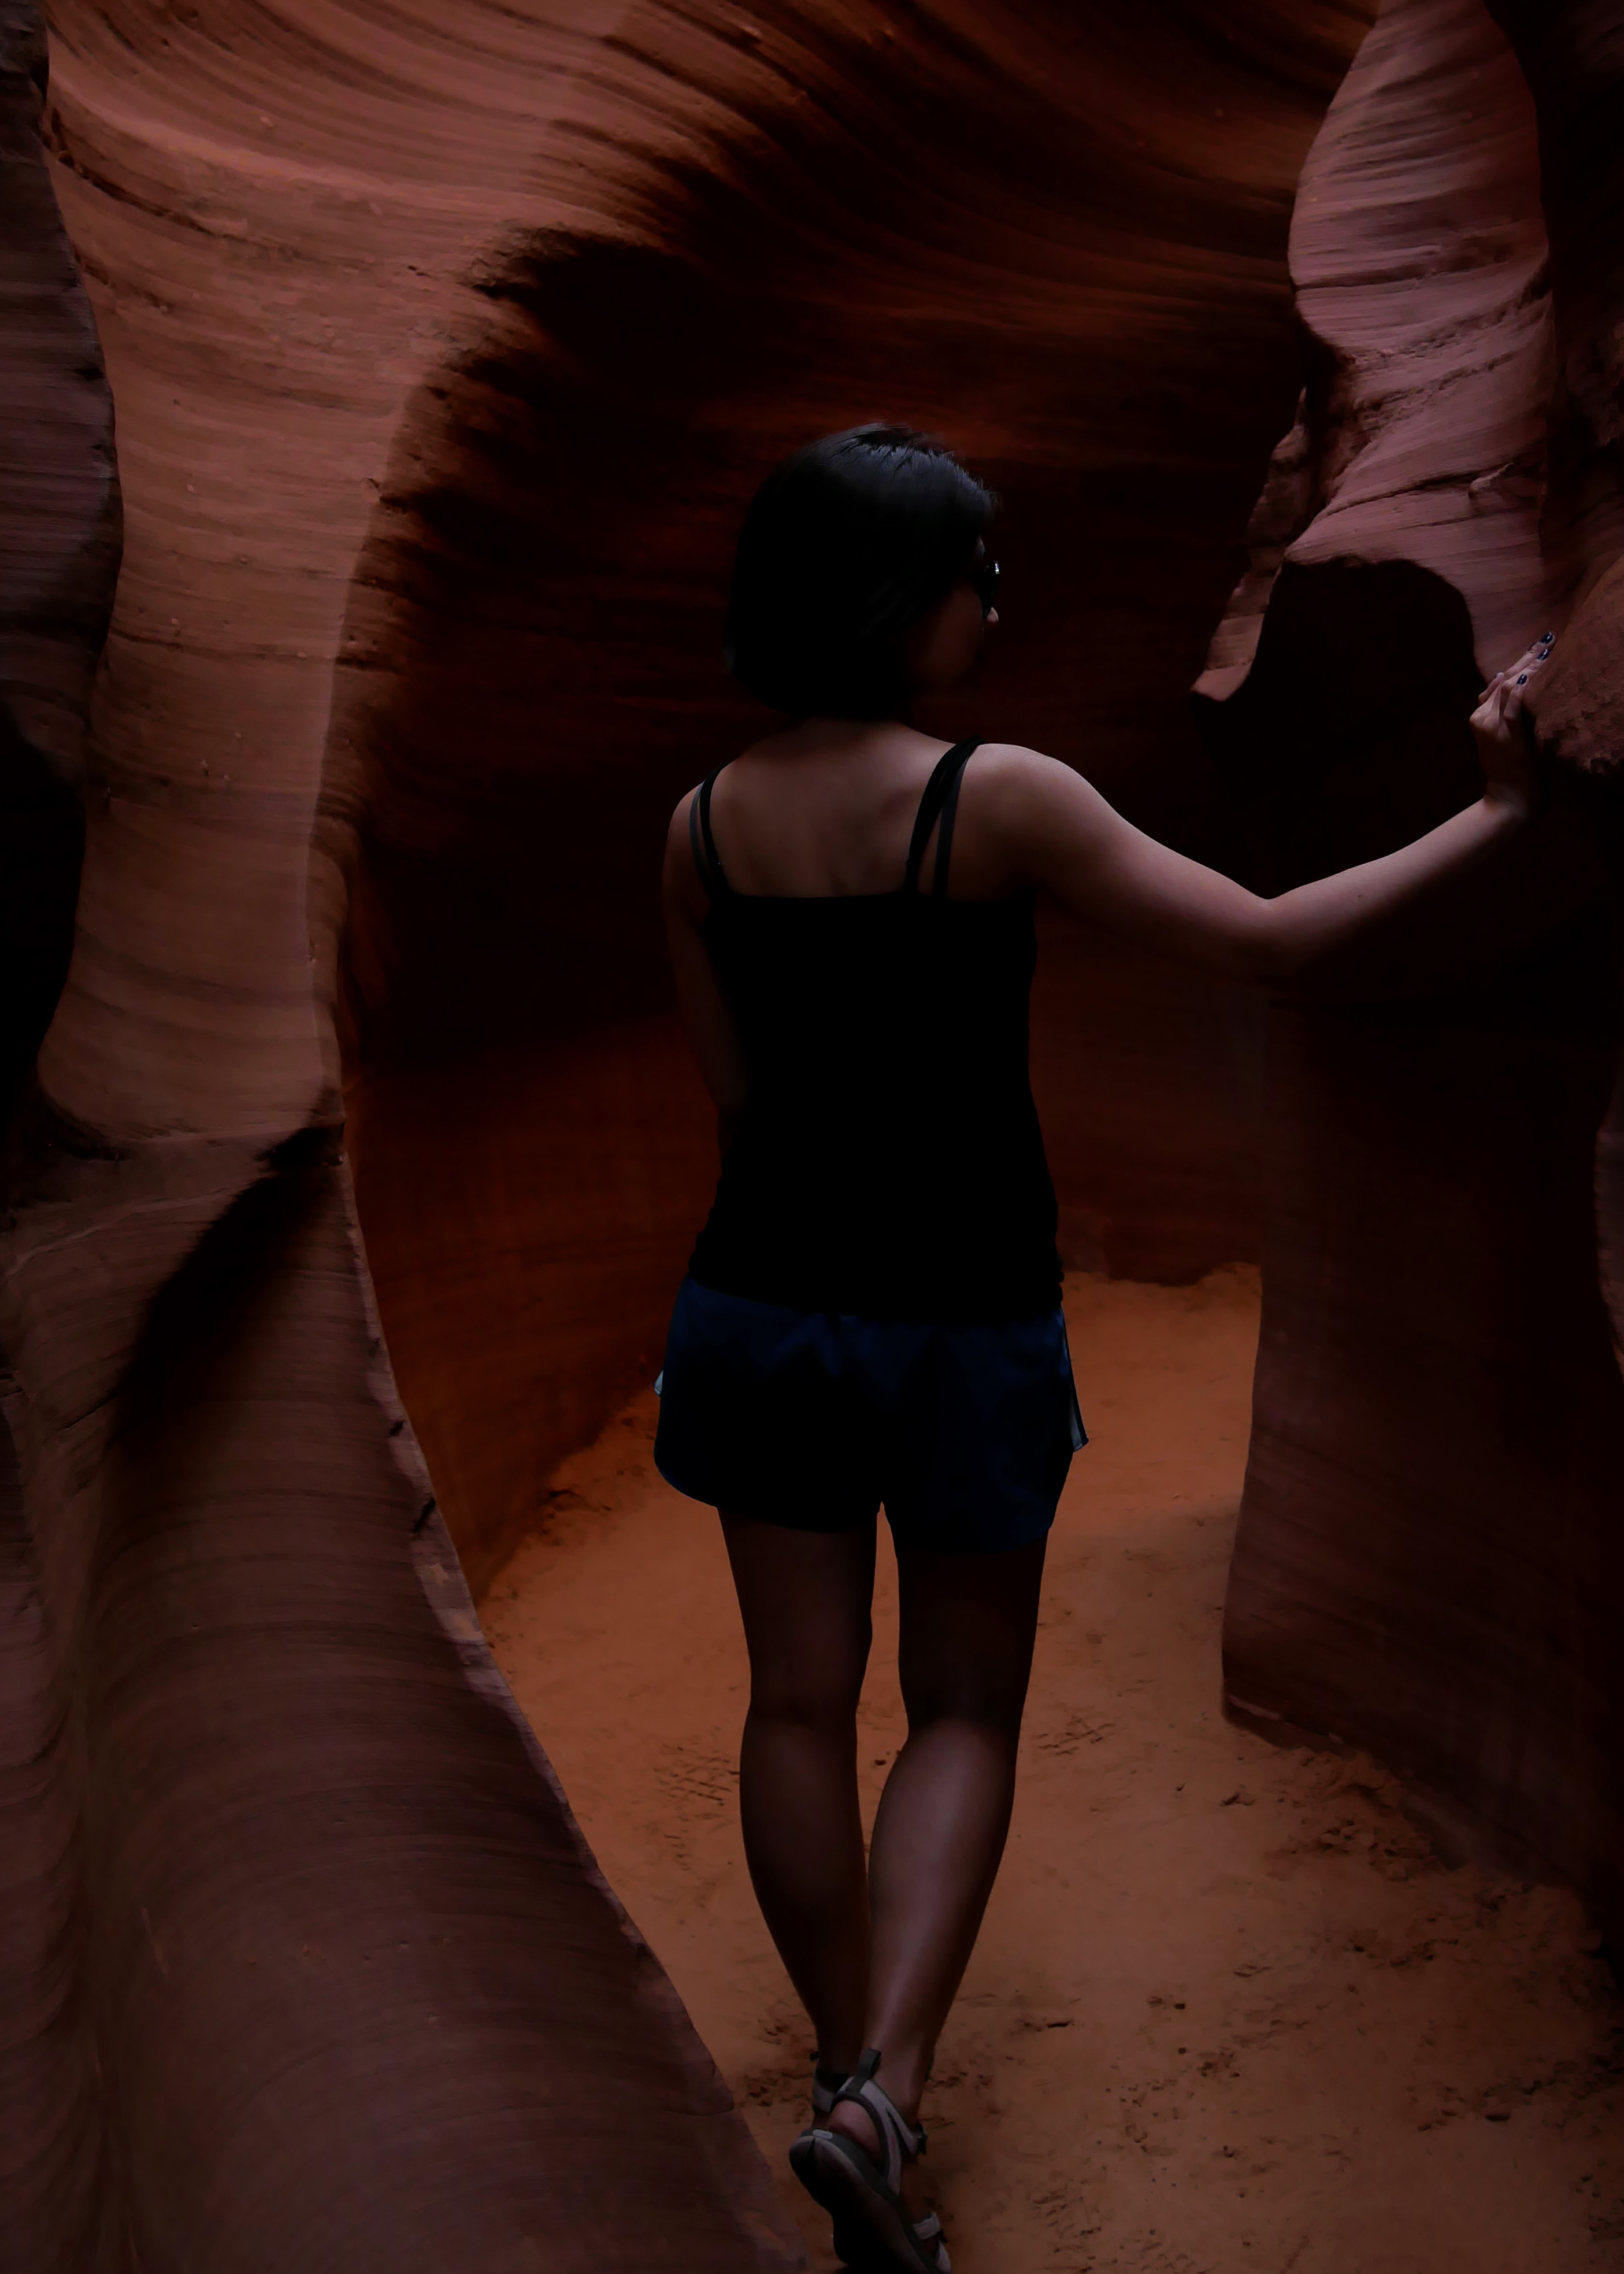
It’s a risk to change your lens while inside since it’s dusty, and sometimes it’s windy. It wasn’t windy when we went there, but I don’t want to risk either. So I chose 20mm pancake lens, ’cause that has the lowest aperture compare to my 2 lenses. Though I also brought my cleaning kit, if ever I will need it.
The guide gave some advise too for the cellphones. To just use the vivid chrome in camera. To have some reddish or violet effect on it.
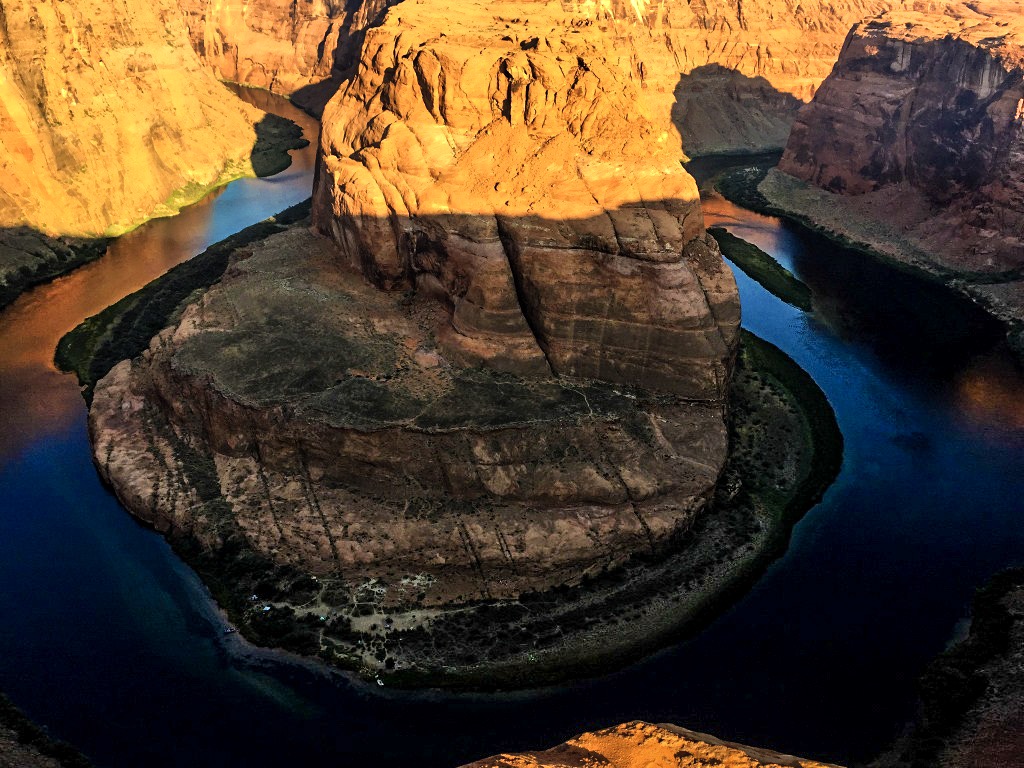
As bonus advise, if you get the chance, and I really hope you visit the Horseshoe Bend while you’re in the area, because this is really stunning! And a huge one indeed.
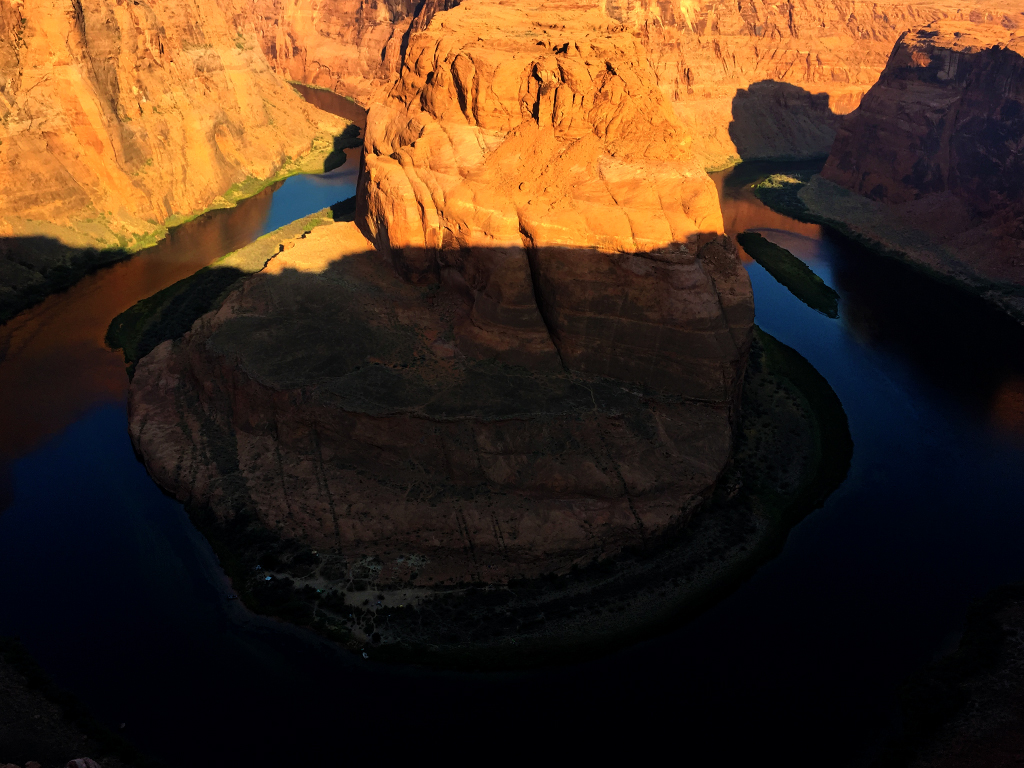
This is the first time I tried using the HDR. I was just disappointed that I had my 20mm and can’t change into wide lens, since it’s dusty too, and too much excitement that I forgot to change while in the car. Nevertheless, I was just really happy to see the Horseshoe Bend.
HDR version
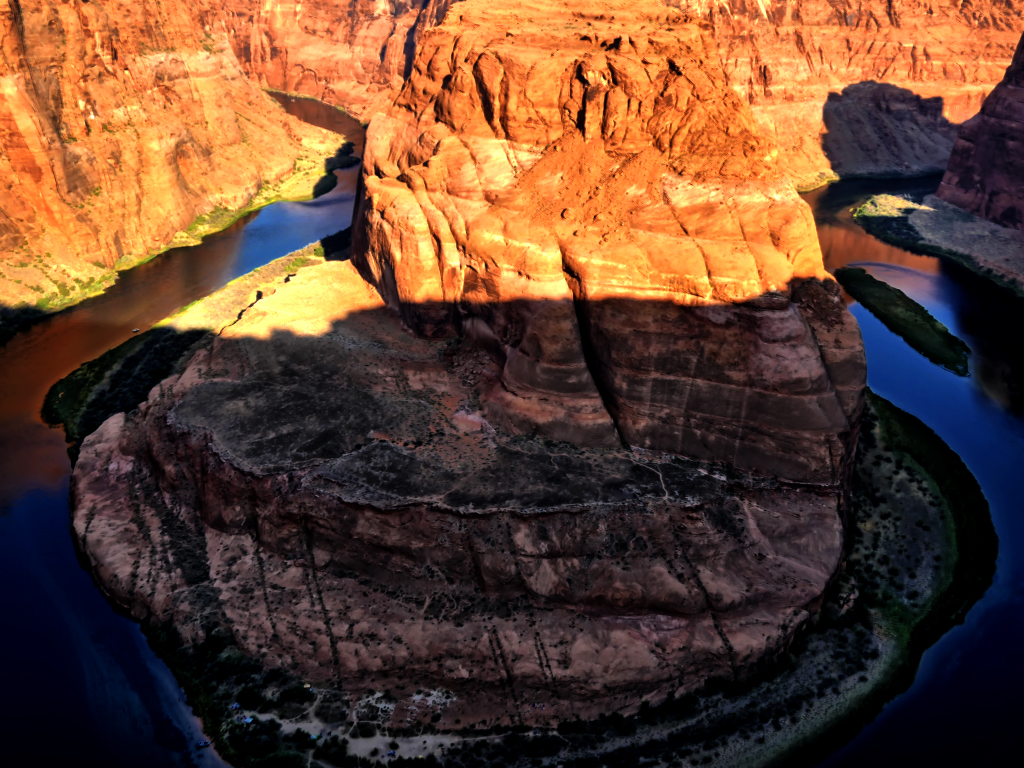
We planned to be there in dawn, but we didn’t beat the sun and so this is how it looks like at 7:00 am during August.
Thank you for these tips. We are headed out that way for spring break next year. So helpful tips, for sure. You captured some beautiful images.
unfortunately your photos would not load except for the first one. thanks for the tips though!!
Joy at The Joyous Living
Thanksfor informing me ?
Can I say that I am impressed by your photography skills… ?
I could never think of clicking pics there. Wow.. Thanks for sharing the FPs and other details too.
You are so well prepared. I took all the pictures with my iPhone 4 when I visited there.LOL
WOW these are all beautiful. I was in photography before, i mean learning photography but my camera was stolen few months ago. 🙁 Saving now to buy new camera. Thanks for the tips! This place is on our bucket list, i hope when the time comes that we are going here i can have a new camera! 🙂
Yeah, for me it’s an investment to keep memories ? thanks
These are some really great shots, thanks for sharing! I totally agree, if you’re going to go somewhere special, you want to make sure you get great photos.
You have shared some great photography tips here. Your photos are stunning. Maybe I will get to see this in real life one day.
Wow, this is such a beautiful photography and I really love it, everything looks so perfect!
This looks like a beautiful place! I am a big hiker, but I have actually never heard of lower antelope canyon before. Definitely something I am going to need to check out some day! Great pics too! I also really like that you posted your camera settings for each picture. This is really helpful to newbie photographers (like myself!)
Great tips, what a beautiful place to take photo in 🙂
In awe with the results of the picture! Thank you for the tips in photography, will definitely use it for my blog!
Great great tips! I’m (unfortunately) still a beginner with photography and often struggling with the settings (and then going back to using automatic *shame*). This post really helps me figuring out what works and what not. THANK YOU!
Some great tips here- I’m just learning to shoot on manual. Most of the time I get too nervous about missing a shot and go back to aperture priority where I’m more comfortable- but I’ll keep trying so I can get shots like these!!!
Well, photography is like anything else in life: You have to train a lot to get better 😉 A pity that you didn’t want to change the lens for the last scene. Another option would have been to do a panorama with the 20mm prime you just were using (multiple portrait-oriented shots you can easily stich together in either lightroom, ptgui or (for free: image composite editor))
Yeah, I just can’t fit all the horseshoe bend even using the 20mm prime haha
I’m new to photography and am really hoping to make it to Antelope Canyon soon so this is perfect! Thanks!
These are great tips and your photographs came out great! But I agree with you, how will everyone know it was a great experience if you don’t have good pictures! Though, I still try to be present instead behind my camera/phone.
Thanks for sharing these tips! i always find it super helpful for trips such as these to really know the nitty gritty details. Also AMAZING photography skills
First I need to go there, and then i will apply what you suggested to take good photos. Amazing tips!!!
Thank you for sharing these tips. I always struggle to photograph places which have limited light. But these tips will definitely help me in future.
Thanks for sharing these tips. Now when I go, I can avoid the mistakes and can learn from your trial and error! This is a place that I have been dying to visit and I almost feel that no pictures will do it justice.
Wow these photos are just immense! Thanks for sharing these tips on how to capture a great photo. I am getting into photography a lot more since I started my blog, so really appreciate tips like this!
OMG, such incredible photos! Thank you for taking us through this gorgeous journey, a once in a lifetime experience for sure!
Love your stunning photographs of Lower Antelope Canyon. Your insightful tips will certainly help other visitors to this place.
Nice photos, tips are so helpful, especially for the ones like me at the first stages.. I’m still on the way….
Your photos were spectacular.
Very good tips, I think they will be useful for me in several places. And of course I would love to visit the Canyon.
Great Tips! I wish I knew these tips before my visit to Antelope Canyon. I took pics from my phone 🙂
Wow, your pictures are absolutely amazing! I can see why the Antelope Canyon is every photographer’s dream
Your photos are stunning, and all the precise information should help even an amateur photographer like myself to take better pictures there 🙂
These are some of the best pictures I have seen and it needs great skill to get such clear and amazing shots. Truly inspiring!
Wooooow , such talent. I am in love with your pictures. I am looking into practicing with my camera more when I travel. Great blog.
Thanks for the amazing photography lessons. I can see how difficult it would be to photograph the lower antelope, but your tips will come in handy
I know this problem to capture the beauty you see on the spot to show it to others – and then it looks all different. Today, I got a new camera. Once I figure out how it’s working, I hope to make pics at least half as amazing as yours 😉
Beautiful photos! I have been to Lower Antelope and the Horseshoe Bend myself. Although I’m impressed with both, the crowd in Antelope Canyon kinda ruined it for me 🙁 There are too many people that you can’t even stop to admire the canyon properly as you are blocking the way. How was the crowd on your trip?
Still the same. And you only have an hour. And sometimes you have to wait for people because they took so long to pose haha
I’ve been wanting to visit this Canyon for ages! Your pictures make me want to visit so bad now! Looks spectacular indeed! 🙂
These photography tips are sooo handy! I’m definitely a point and click kinda girl but I want to finally get to grips with using my camera properly.
Thanks for sharing,
Jaz
I love seeing pics of Antelope Canyon and its sedimentary strata. beyond unique. I hope my phone can take clear pics like these when I go because I cannot afford them costly cameras yet.
You will, they will help you set up your phone too ?
Thanks for the tips, it’s one place I really want to get to. Looks stunning.
One of my favorite places on Earth! It’s magical isn’t it? Great pics, I love seeing other’s photos from this location too.
Thanks! Yeah, you can’t just stop clicking your camera haha.